
Weapon Equipment is a component that allows you to manage a character’s equipment. It is not an inventory system. This component simply lets you define the possible attachment points on the character and manage their properties. This component automates much of the process of attaching and storing weapons on the character. It also provides the necessary APIs to manage weapons and attachment points, and to retrieve the information needed to update the user interface.
HOW TO CREATE? #
When you’re editing your character’s blueprint, simply add a new component called Weapon Equipment. It’s located in the Weapon Designer category. You can also add it in-game using the Add Component node.
HOW TO CONFIGURE? #
- Select the search mode for the mesh that will hold the weapons.
- Set the properties for the right and/or left hand.
- Specify the possible storage locations (back, hip, etc.). There may be none. In that case, leave the array empty.
- Select the class of the Weapon Pickup that will be created when the player drops the weapon.
HOW TO USE? #
Weapon Equipment provides all the functions needed to manage a character’s equipment. You must respond to the On Right Hand Equipped event to save the weapon instance so that you can later send a message to that weapon when the player wants to fire it. You can also simply call the Get Weapon In Right Hand function to retrieve the instance of the weapon currently in the right hand. Finally, you can manually manage weapon storage by calling the necessary functions, such as Store Weapon, Equip Right Hand From Holster, or Release Weapon From Right Hand.
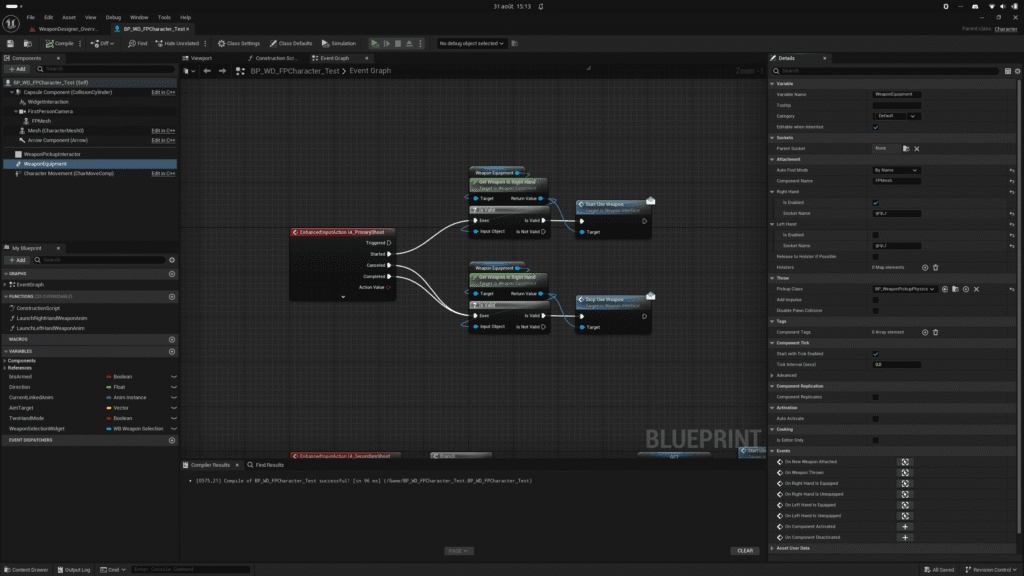
AUTO FIND MESH #
You must define the character mesh that will be used to attach the weapons. You can do this manually using the Set Attachment Mesh function or use the automatic search system. The automatic search will find the first component that can accommodate the weapons. If you prefer, you can instead select a search by name or by tag.
RIGHT & LEFT HAND #
You must define the properties for the right hand and/or the left hand. These are the so-called “active” slots on Weapon Equipment. It is the right or left hand that interacts with the weapon (shooting, reloading, inspecting, etc.). For each hand, you must specify whether it is enabled and the name of the socket that will be used to attach the weapon. The socket must, of course, exist on the character’s mesh.
HOLSTER #
These are known as “inactive” storage slots on Weapon Equipment. These are the locations where weapons can be attached and used later. On a video game character, a weapon can be stored on the hip or on the back. You can define as many storage slots as you like, whether they’re realistic or not. You’ll also need to specify whether the storage slot is enabled and the name of the socket that will be used to attach the weapon. Additional properties allow you to control the automatic attachment of weapons.
There is a priority system so that the character stores the weapon in specific holsters first, as well as a tag-based filtering system. You can add a tag to your weapons to define their category, for example (Pistol, Assault Rifle, or Light, Medium, Heavy, etc.). For each holster, you can specify which tags are accepted. This prevents, for example, an assault rifle from being attached to the hip.
RELEASE TO HOLSTER IF POSSIBLE #
If set to true, when the hands have a new weapon, the currently equipped weapon is automatically stored in a holster. Otherwise the currently equipped weapon is thrown in the world.
EVENT #
- On New Weapon Attached: Called when a weapon is attached to the pawn.
- On Weapon Thrown: Called when a weapon is detached from a pawn.
- On Right Hand Is Equipped: Called when a weapon is attached to the right hand.
- On Right Hand Is Unequipped: Called when a weapon is detached from the right hand.
- On Left Hand Is Equipped: Called when a weapon is attached to the left hand.
On Left Hand Is Unequipped: Called when a weapon is detached from the left hand.


